Mark II - The final product
All my development and research work was now complete and the USB stick was ready to go into final production.
This was undertaken in exactly the same way as Mark I (with the revisions made) only this time with the aim of creating a final high finished product.
* CAD drawings were CAD manufactured on the FDM machine
* Pieces were soaked in alkaline tank to remove starch based build material
This created the basic plastic pieces as in Mark I, however now further finishing was required before taking the pieces to paint.
I chose to use the FDM method due to the detailed finish it creates and had to be careful not to loose this with pre-paint finishing, this involved fine sanding of the pieces to remove ridges and imperfections created during the FDM build process.
Adding Colour & Detail
Before painting anything preparation is key, this involved two main aspects for my project.
1: Surface preparation of the pieces, fine sanding and filling to remove imperfections and also to key the surface to allow the paint to adhere to the surface.
2: Creating a Jig to support the pieces during painting, this does not need to be pretty just functional. I created mine from some off cut timber and pieces of old copper pipe, this allowed the pieces to be sprayed from all directions and to keep them securely supported to stop the wet paint coming into contact with anything that may mark the paint.
Painting my items will be undertaken in the 'Spray Booth' and is completed using the same process as spraying a car or any other item requiring a high quality paint finish, see below for further details.
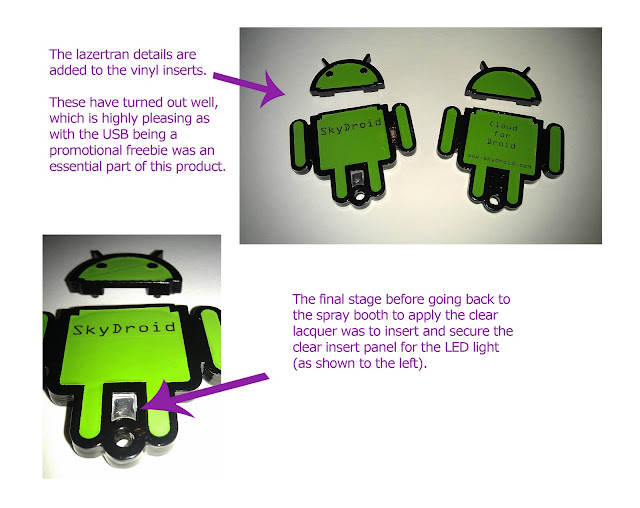
Once the top coat has dried and before the lacquer is applied the vinyl inserts, lazertran text and clear acrylic insert must be added. This is all sealed in by applying an overcoat of clear lacquer which will protect the paintwork and make the item harder wearing.
The USB Memory Stick is almost complete
Once the clear lacquer had dried all components can now be assembled, this is done using a small amount of adhesive and the fixing methods designed and earlier described.
Below shows a series of images of the finished product and some of its features in use.
The Cap in Action


